

1、请详细描述CentOS系统的启动流程(详细到每个过程系统做了哪些事情)
CentOS系统启动流程:
1.加电自检:由bios去检测各硬件是否存在且是否正常运行,然后进行硬件初始化
2.选择启动顺序,加载mbr:根据bios设置的设备启动顺序,找到第一个安装有bootloader的设备进行启动,bootloader去识别加载操作系统中的核心文件,并提交到内存中运行,进而来启动相对应的操作系统
由于bootloader处于mbr中,而mbr只有446bytes用来存储bootloader,而446bytes无法容纳下bootloader,因此linux将bootloader运行和加载分成三个阶段:
stage1:运行bootloader主程序,这个程序必须要被安装在启动区,即MBR中。因为mbr空间有限,因此在mbr当中仅安装bootloader的最小主程序,并没有安装bootloader的相关配置文件
stage1.5:在mbr随后的扇区中存放,主要用于与stage2所在的分区的文件系统进行交互。
stage2:通过bootloader加载所有配置文件及相关的环境参数信息,这些配置文件及相关的环境参数都存放于磁盘分区上的/boot目录下。
3.加载系统内核,执行系统初始化信息:bootloader加载内核和initrd,然后在内存中让initrd解压缩成根目录,然后内核可以在这个虚拟的根文件系统之上加载合适的驱动程序,来加载硬盘等设备,之后释放虚拟的根文件系统,并以只读的方式挂载磁盘上的真实的根文件系统,之后就开始正常的启动过程
4.启动用户空间第一个执行程序/sbin/init:init主要功能是准备软件运行环境,包括系统的主机名称,网络配置、文件系统格式等其他服务的启动管理
init是通过自上而下读取inittab文件来依次执行的,因此init的处理流程是:
1、读取默认的runlevel,
2、使用/etc/rc/d/rc.sysinit进行系统初始化。
(1)根据配置文件中的设定来设定主机名(读取/etc/sysconfig/network文件中的HOSTNAME进行)
(2)打印文本欢迎信息;
(3)激活SELinux和udev;
(4)挂在所有定义在/etc/fstab文件中的文件系统
(5)激活swap设备
(6)检测根文件系统,并实现以读写方式重新挂载;
(7)设置系统时钟
(8)更具/etc/sysctl.conf文件设定内核参数的值
(9)激活LVM和RAID设备
(10)加载额外的设备启动
(11)清理操作
3、由于采用的的是3级别,因此只进行l3:3:wait:/etc/rc.d/rc 3,其他的则忽略
4、配置好ctrl+alt+del组合件的功能
5、配置不断电系统pf、pr两种机制
6、启动mingetty 6个终端
7、如果是5级别,则会以/etc/X11/prefdm-nodaemon启动图形化界面
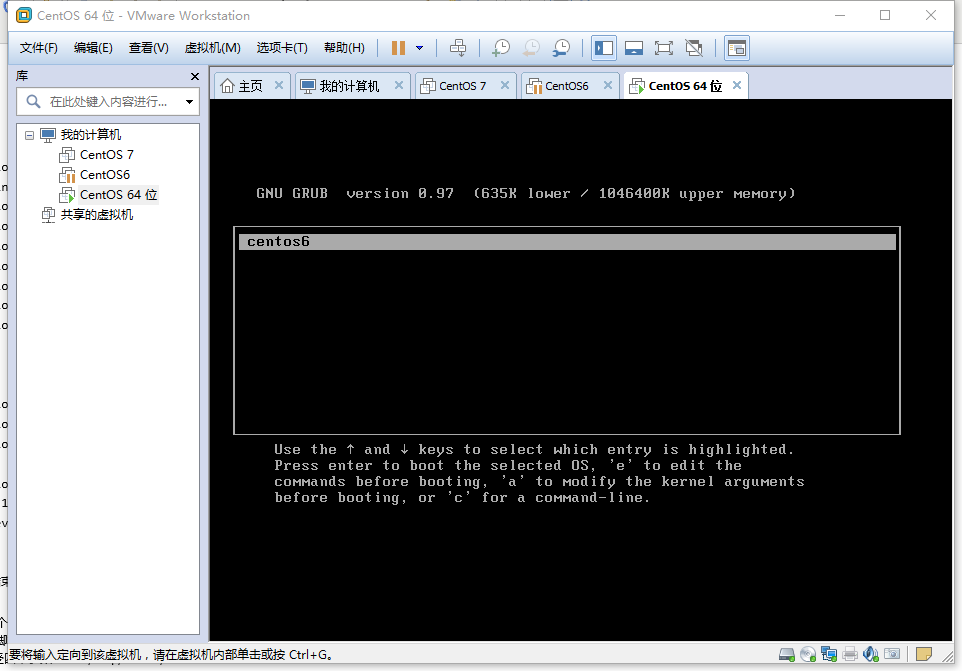
2、为运行于虚拟机上的CentOS 6添加一块新硬件,提供两个主分区;
(1) 为硬盘新建两个主分区;并为其安装grub;
(2) 为硬盘的第一个主分区提供内核和ramdisk文件; 为第二个分区提供rootfs;
(3) 为rootfs提供bash、ls、cat程序及所依赖的库文件;
(4) 为grub提供配置文件;
(5) 将新的硬盘设置为第一启动项并能够正常启动目标主机;
首先为虚拟机添加一块硬盘。
[root@localhost ~]# fdisk -l                             #查看硬盘设备

Disk /dev/sda: 128.8 GB, 128849018880 bytes
255 heads, 63 sectors/track, 15665 cylinders
Units = cylinders of 16065 * 512 = 8225280 bytes
Sector size (logical/physical): 512 bytes / 512 bytes
I/O size (minimum/optimal): 512 bytes / 512 bytes
Disk identifier: 0x000eb0a4

   Device Boot      Start         End      Blocks   Id  System
/dev/sda1   *           1          26      204800   83  Linux
Partition 1 does not end on cylinder boundary.
/dev/sda2              26        2637    20971520   83  Linux
/dev/sda3            2637        5248    20971520   83  Linux
/dev/sda4            5248       15666    83680256    5  Extended
/dev/sda5            5248        5509     2097152   82  Linux swap / Solaris

Disk /dev/sdb: 42.9 GB, 42949672960 bytes                    #/dev/sdb为新添加的设备
255 heads, 63 sectors/track, 5221 cylinders
Units = cylinders of 16065 * 512 = 8225280 bytes
Sector size (logical/physical): 512 bytes / 512 bytes
I/O size (minimum/optimal): 512 bytes / 512 bytes
Disk identifier: 0x272777ca

   Device Boot      Start         End      Blocks   Id  System
[root@localhost ~]# fdisk /dev/sdb                            #对/dev/sdb进行分区  sdb1 200M sdb2 5G sdb3 2G

WARNING: DOS-compatible mode is deprecated. It's strongly recommended to
         switch off the mode (command 'c') and change display units to
         sectors (command 'u').

Command (m for help): n
Command action
   e   extended
   p   primary partition (1-4)
p
Partition number (1-4): 1
First cylinder (1-5221, default 1):
Using default value 1
Last cylinder, +cylinders or +size{K,M,G} (1-5221, default 5221): +200M

Command (m for help): n
Command action
   e   extended
   p   primary partition (1-4)
p
Partition number (1-4): 2
First cylinder (27-5221, default 27):
Using default value 27
Last cylinder, +cylinders or +size{K,M,G} (27-5221, default 5221): +5G

Command (m for help): n
Command action
   e   extended
   p   primary partition (1-4)
p
Partition number (1-4): 3
First cylinder (681-5221, default 681): +2G
Value out of range.
First cylinder (681-5221, default 681):
Using default value 681
Last cylinder, +cylinders or +size{K,M,G} (681-5221, default 5221): +2G

Command (m for help): w
The partition table has been altered!

Calling ioctl() to re-read partition table.
Syncing disks.
[root@localhost ~]# partx -a /dev/sdb
BLKPG: Device or resource busy
error adding partition 1
BLKPG: Device or resource busy
error adding partition 2
BLKPG: Device or resource busy
error adding partition 3
[root@localhost ~]# mke2fs -t ext4 /dev/sdb1
mke2fs 1.41.12 (17-May-2010)
文件系统标签=
操作系统:Linux
块大小=1024 (log=0)
分块大小=1024 (log=0)
Stride=0 blocks, Stripe width=0 blocks
52208 inodes, 208812 blocks
10440 blocks (5.00%) reserved for the super user
第一个数据块=1
Maximum filesystem blocks=67371008
26 block groups
8192 blocks per group, 8192 fragments per group
2008 inodes per group
Superblock backups stored on blocks:
    8193, 24577, 40961, 57345, 73729, 204801

正在写入inode表: 完成
Creating journal (4096 blocks): 完成
Writing superblocks and filesystem accounting information: 完成

This filesystem will be automatically checked every 27 mounts or
180 days, whichever comes first.  Use tune2fs -c or -i to override.
[root@localhost ~]# mke2fs -t ext4 /dev/sdb2
mke2fs 1.41.12 (17-May-2010)
文件系统标签=
操作系统:Linux
块大小=4096 (log=2)
分块大小=4096 (log=2)
Stride=0 blocks, Stripe width=0 blocks
328656 inodes, 1313313 blocks
65665 blocks (5.00%) reserved for the super user
第一个数据块=0
Maximum filesystem blocks=1346371584
41 block groups
32768 blocks per group, 32768 fragments per group
8016 inodes per group
Superblock backups stored on blocks:
    32768, 98304, 163840, 229376, 294912, 819200, 884736

正在写入inode表: 完成
Creating journal (32768 blocks): 完成
Writing superblocks and filesystem accounting information: 完成

This filesystem will be automatically checked every 36 mounts or
180 days, whichever comes first.  Use tune2fs -c or -i to override.
[root@localhost ~]# mkswap /dev/sdb3
Setting up swapspace version 1, size = 2104508 KiB
no label, UUID=7c8961cc-2b83-4b2c-9774-89cf4145d2f9

[root@localhost ~]# mkdir /mnt/{boot,rootfs}                  #在mnt下创建 boot 和 rootfs 目录
[root@localhost ~]# mount /dev/sdb1 /mnt/boot                 #将sdb1挂载到 boot 目录下
[root@localhost ~]# mount /dev/sdb2 /mnt/rootfs               #将sdb2挂载到 rootfs 目录下
[root@localhost ~]# grub-install --root-directory=/mnt /dev/sdb       #安装grub到/mnt,grub会自动寻找/mnt目录并安装grub。
Probing devices to guess BIOS drives. This may take a long time.
Installation finished. No error reported.
This is the contents of the device map /mnt/boot/grub/device.map.
Check if this is correct or not. If any of the lines is incorrect,
fix it and re-run the script `grub-install'.

(fd0)   /dev/fd0
(hd0)   /dev/sda
(hd1)   /dev/sdb
[root@localhost ~]# cp /boot/vmlinuz-2.6.32-696.el6.x86_64 /mnt/boot/vmlinuz              #grub安装完成但boot目录下没有内核以及initrd文件需手动复制当前主机的内核及initrd至boot目录
[root@localhost ~]# cp /boot/initramfs-2.6.32-696.el6.x86_64.img /mnt/boot/initramfs.img
[root@localhost ~]# vim /mnt/boot/grub/grub.conf             #新安装的grub没有配置文件需要手动创建grub.conf的配置文件

default=0
timeout=5
title centos6
        root (hd0,0)
        kernel /vmlinuz selinux=0 ro root=/dev/sda2 init=/bin/bash    #由于启动时第一个程序是bash,所以需要指定init为/bin/bash
        initrd /initramfs.img


[root@localhost ~]# mkdir -p /mnt/rootfs/{root,bin,sbin,lib,lib64,var,proc,sys,tmp,media,home,etc,dev}   #为根目录创建各子目录
[root@localhost ~]# ldd /bin/bash                                         #查找bash,ls,cat的依赖关系,并复制各依赖的文件至相对应的目录下
  linux-vdso.so.1 =>  (0x00007ffe711e9000)
    libtinfo.so.5 => /lib64/libtinfo.so.5 (0x0000003cf4a00000)
    libdl.so.2 => /lib64/libdl.so.2 (0x0000003cec600000)
    libc.so.6 => /lib64/libc.so.6 (0x0000003ceca00000)
    /lib64/ld-linux-x86-64.so.2 (0x0000003cec200000)
[root@localhost ~]# cd /mnt/rootfs/lib64
[root@localhost lib64]# cp /lib64/libtinfo.so.5 .
[root@localhost lib64]# cp /lib64/libdl.so.2 .
[root@localhost lib64]# cp /lib64/libc.so.6 .
[root@localhost lib64]# cp /lib64/ld-linux-x86-64.so.2 .
[root@localhost lib64]# ldd /bin/ls
    linux-vdso.so.1 =>  (0x00007fff5d726000)
    libselinux.so.1 => /lib64/libselinux.so.1 (0x0000003cee200000)
    librt.so.1 => /lib64/librt.so.1 (0x0000003ced200000)
    libcap.so.2 => /lib64/libcap.so.2 (0x0000003cf9e00000)
    libacl.so.1 => /lib64/libacl.so.1 (0x0000003cf7a00000)
    libc.so.6 => /lib64/libc.so.6 (0x0000003ceca00000)
    libdl.so.2 => /lib64/libdl.so.2 (0x0000003cec600000)
    /lib64/ld-linux-x86-64.so.2 (0x0000003cec200000)
    libpthread.so.0 => /lib64/libpthread.so.0 (0x0000003cece00000)
    libattr.so.1 => /lib64/libattr.so.1 (0x0000003cfc200000)
[root@localhost lib64]# cp /lib64/libse
libselinux.so.1   libsemanage.so.1  libsepol.so.1
[root@localhost lib64]# cp /lib64/libselinux.so.1 .
[root@localhost lib64]# cp /lib64/librt.so.1 .
[root@localhost lib64]# cp /lib64/libcap.so.2 .
[root@localhost lib64]# cp /lib64/libacl.so.1 .
[root@localhost lib64]# cp /lib64/libpthread.so.0 .
[root@localhost lib64]# cp /lib64/libattr.so.1 .
[root@localhost lib64]# ldd /bin/cat
    linux-vdso.so.1 =>  (0x00007fffbcd6c000)
    libc.so.6 => /lib64/libc.so.6 (0x0000003ceca00000)
    /lib64/ld-linux-x86-64.so.2 (0x0000003cec200000)
[root@localhost ~]# cp /bin/bash /mnt/rootfs/bin
[root@localhost ~]# cp /bin/cat /mnt/rootfs/bin
[root@localhost ~]# cp /bin/ls /mnt/rootfs/bin

[root@localhost ~]# chroot /mnt/rootfs                   #切换根进行测试
bash-4.1# ls
bin  dev  etc  home  lib  lib64  lost+found  media  proc  root  sbin  sys  tmp  var
以上步骤结束后就可以将新添加的硬盘装到新的虚拟机上进行运行。

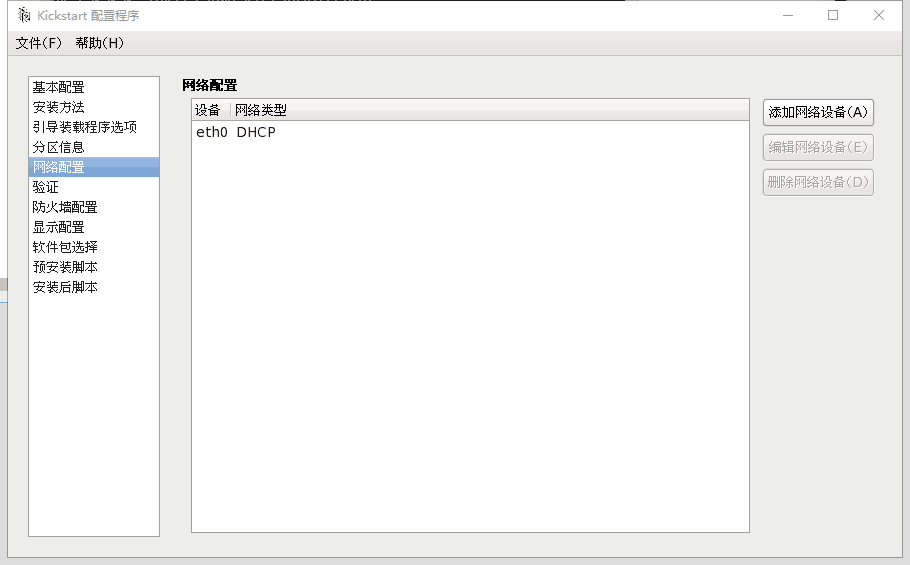
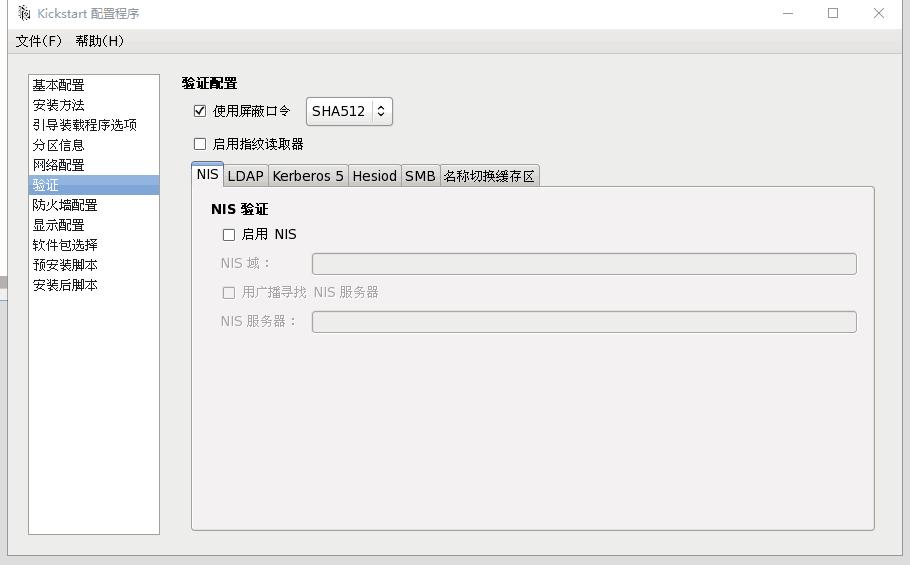
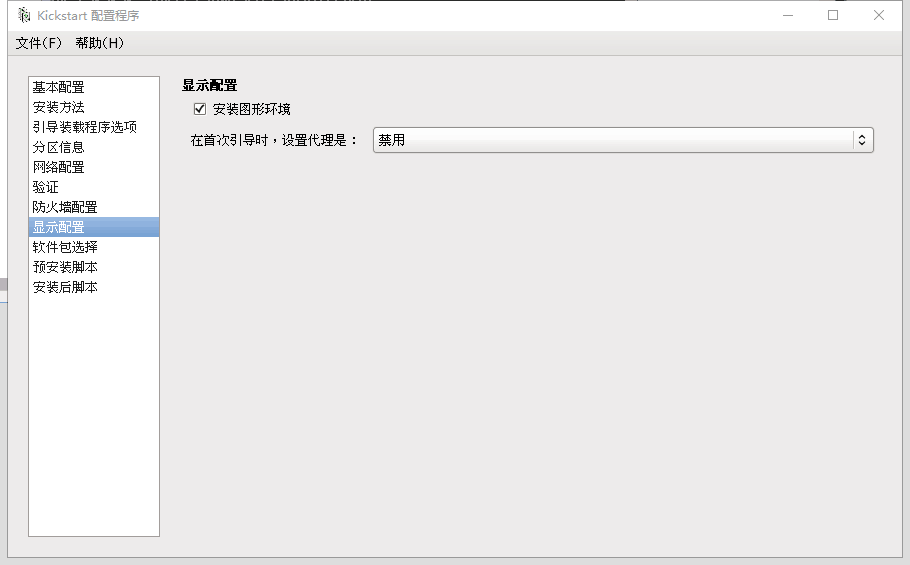
3、制作一个kickstart文件以及一个引导镜像。描述其过程。
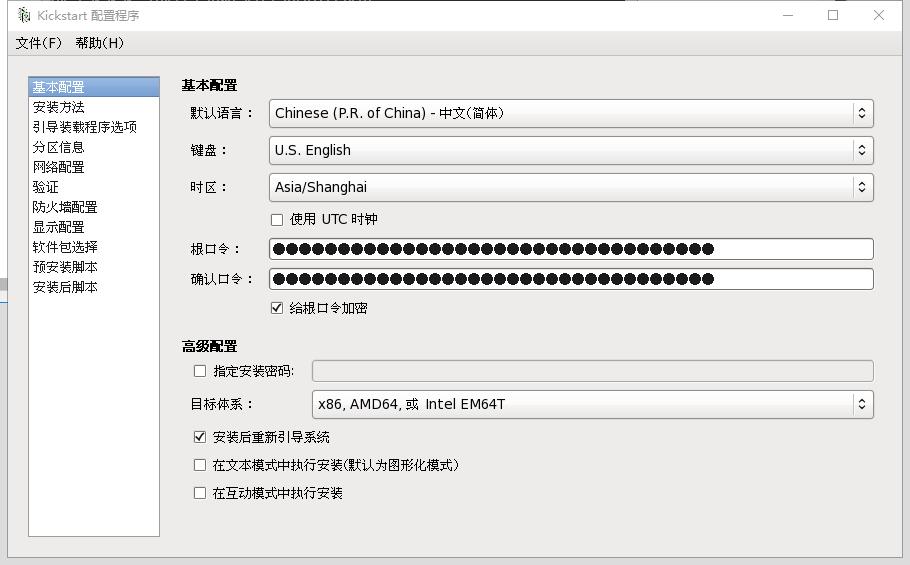
kickstart文件可以管理员根目录下的anaconda-ks.cfg文件为模板进行修改,也可以使用system-config-kickstart工具进行制作
以下为使用system-config-kickstart工具制作kickstart文件:
1.配置默认语言、键盘、时区以及root密码
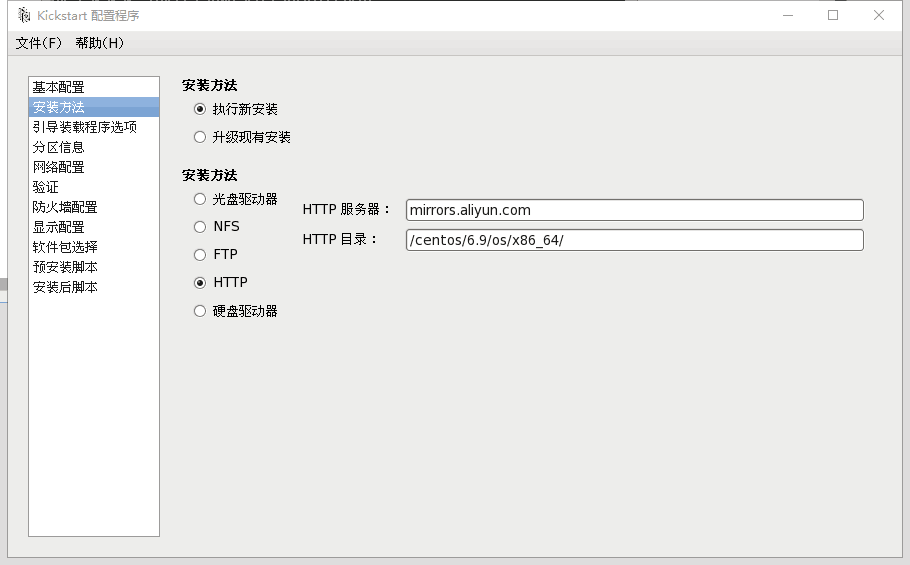
2、配置安装方法,可以使用网络镜像的方法进行安装
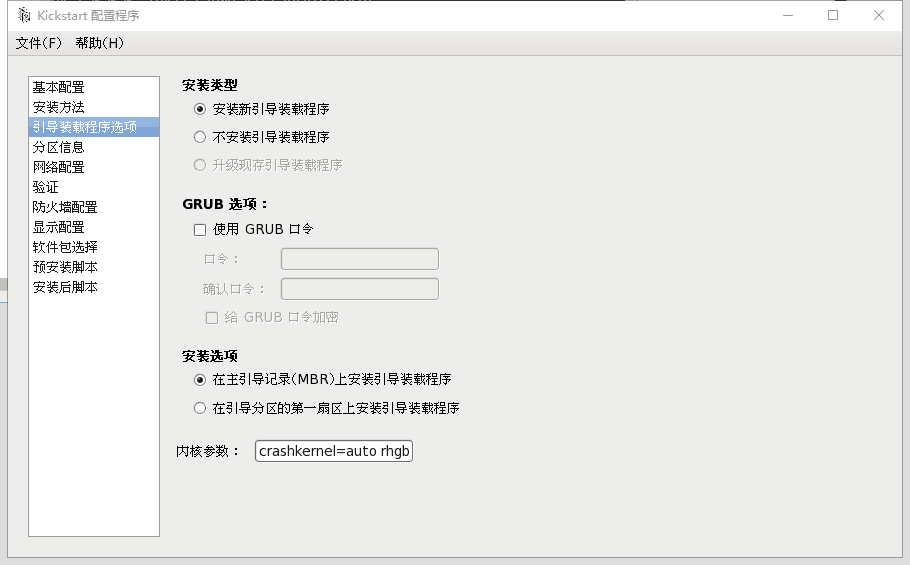
3、配置grub相关的设置
4、分区的设置,此处注意布局分区大小时所有分区的总和一定不要超过硬盘总大小,否则自动引导会失败
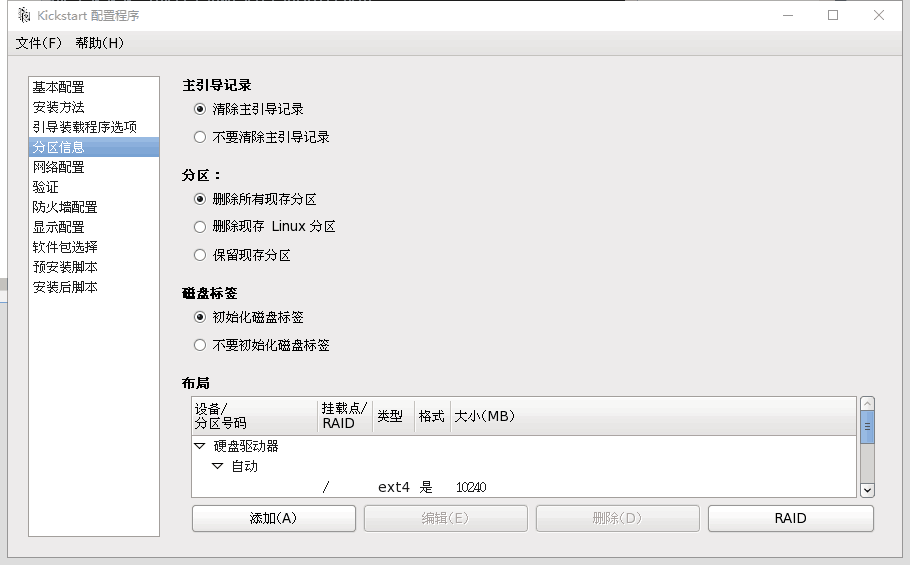
5、由于使用的是网络镜像的安装方法,此处网络的配置是必须的。
6、验证相关、
7、防火墙相关的配置,此处可根据情况使用激活或者禁用

8、图形界面配置、可安装也可不安装
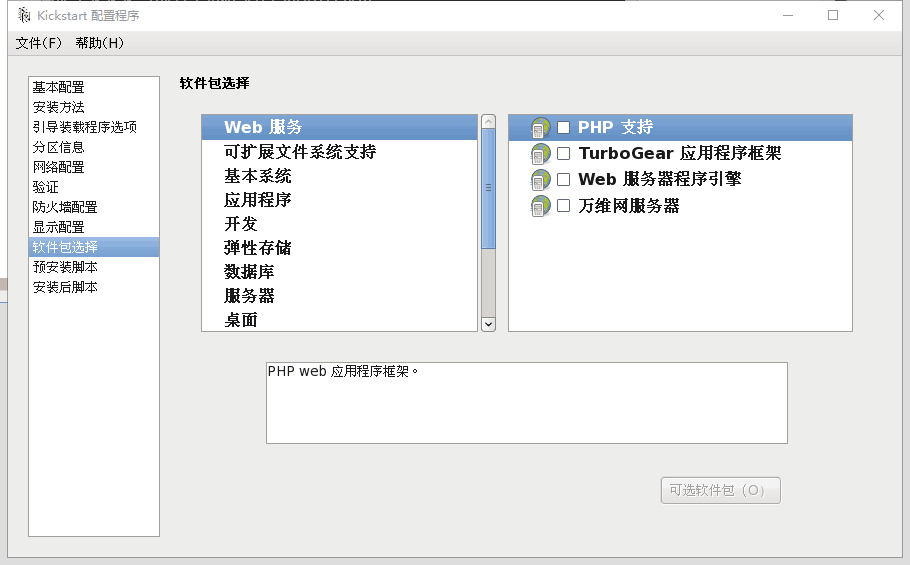
9、选择软件包的安装
10、此处可以配置安装前的脚本

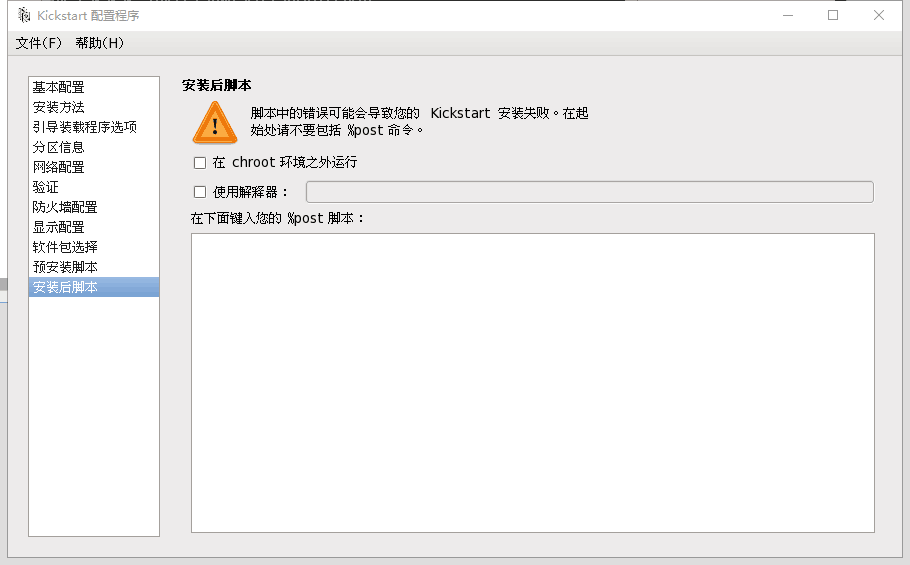
11、在此处可以进行安装后脚本的配置
以上设置全部完成后进行保存。
手动编辑ks文件,将repo这行的baseurl改为阿里云
repo --name="CentOS" --baseurl="http://mirrors.aliyun.com/centos/6.9/os/x86_64/" --cost=100
现在ks文件有了,可以进行制作引导镜像了
首先将CenOS光盘镜像挂载上将其中的的ioslinux目录及目录下的文件复制出一份至/tmp/myboot目录内
[root@localhost ~]# mount /dev/sr0 /mnt
mount: block device /dev/sr0 is write-protected, mounting read-only
[root@localhost ~]# mkdir /tmp/myboot
[root@localhost ~]# cp -a /mnt/isolinux/ /tmp/myboot/
将制作好的ks文件放到myboot目录中
[root@localhost ~]# cp ks.cfg /tmp/myboot/
[root@localhost ~]# cd /tmp/myboot/
[root@localhost myboot]# ls
isolinux  ks.cfg
现在需要修改isolinux中的isolinux.conf这个配置文件。
[root@localhost isolinux]# chmod +w isolinux.cfg
[root@localhost isolinux]# vim isolinux.cfg


timeout 600

display boot.msg

menu background splash.jpg
menu title Welcome to CentOS 6.9!
menu color border 0 #ffffffff #00000000
menu color sel 7 #ffffffff #ff000000
menu color title 0 #ffffffff #00000000
menu color tabmsg 0 #ffffffff #00000000
menu color unsel 0 #ffffffff #00000000
menu color hotsel 0 #ff000000 #ffffffff
menu color hotkey 7 #ffffffff #ff000000
menu color scrollbar 0 #ffffffff #00000000

label linux
  menu label ^Install or upgrade an existing system
  menu default
  kernel vmlinuz
  append initrd=initrd.img ks=cdrom:/ks.cfg    #在此处添加ks=cdrom:/ks.cfg  由于ks文件已经配置网卡以及网络此处只需要给出ks文件路径就可以,如果没有dhcp服务,此处需要手动指定,指定方法ip=xxx.xxx.xxx.xxx netmast=xxx.xxx.xxx.xxx gateway=xxx.xxx.xxx.xxx
以上全部完成后需要用mkisofs命令进行制作 iso文件,使用mkisofs命令制作iso文件时,工作目录必须要在myboot目录之外
[root@localhost tmp]# mkisofs -R -J -T -v --no-emul-boot --boot-load-size 4 --boot-info-table -V "centos 6 x86_64 boot" -c isolinux/boot.cat -b isolinux/isolinux.bin -o /tmp/boot.iso myboot/
I: -input-charset not specified, using utf-8 (detected in locale settings)
genisoimage 1.1.9 (Linux)
Scanning myboot/
Scanning myboot/isolinux
Excluded: myboot/isolinux/TRANS.TBL
Excluded by match: myboot/isolinux/boot.cat
Writing:   Initial Padblock                        Start Block 0
Done with: Initial Padblock                        Block(s)    16
Writing:   Primary Volume Descriptor               Start Block 16
Done with: Primary Volume Descriptor               Block(s)    1
Writing:   Eltorito Volume Descriptor              Start Block 17
Size of boot image is 4 sectors -> No emulation
Done with: Eltorito Volume Descriptor              Block(s)    1
Writing:   Joliet Volume Descriptor                Start Block 18
Done with: Joliet Volume Descriptor                Block(s)    1
Writing:   End Volume Descriptor                   Start Block 19
Done with: End Volume Descriptor                   Block(s)    1
Writing:   Version block                           Start Block 20
Done with: Version block                           Block(s)    1
Writing:   Path table                              Start Block 21
Done with: Path table                              Block(s)    4
Writing:   Joliet path table                       Start Block 25
Done with: Joliet path table                       Block(s)    4
Writing:   Directory tree                          Start Block 29
Done with: Directory tree                          Block(s)    2
Writing:   Joliet directory tree                   Start Block 31
Done with: Joliet directory tree                   Block(s)    2
Writing:   Directory tree cleanup                  Start Block 33
Done with: Directory tree cleanup                  Block(s)    0
Writing:   Extension record                        Start Block 33
Done with: Extension record                        Block(s)    1
Writing:   The File(s)                             Start Block 34
 21.94% done, estimate finish Tue Aug  8 13:10:21 2017
 43.79% done, estimate finish Tue Aug  8 13:10:21 2017
 65.71% done, estimate finish Tue Aug  8 13:10:21 2017
 87.57% done, estimate finish Tue Aug  8 13:10:21 2017
Total translation table size: 4701
Total rockridge attributes bytes: 1438
Total directory bytes: 2654
Path table size(bytes): 26
Done with: The File(s)                             Block(s)    22659
Writing:   Ending Padblock                         Start Block 22693
Done with: Ending Padblock                         Block(s)    150
Max brk space used 0
22843 extents written (44 MB)
至此引导镜像文件制作完成。
测试:
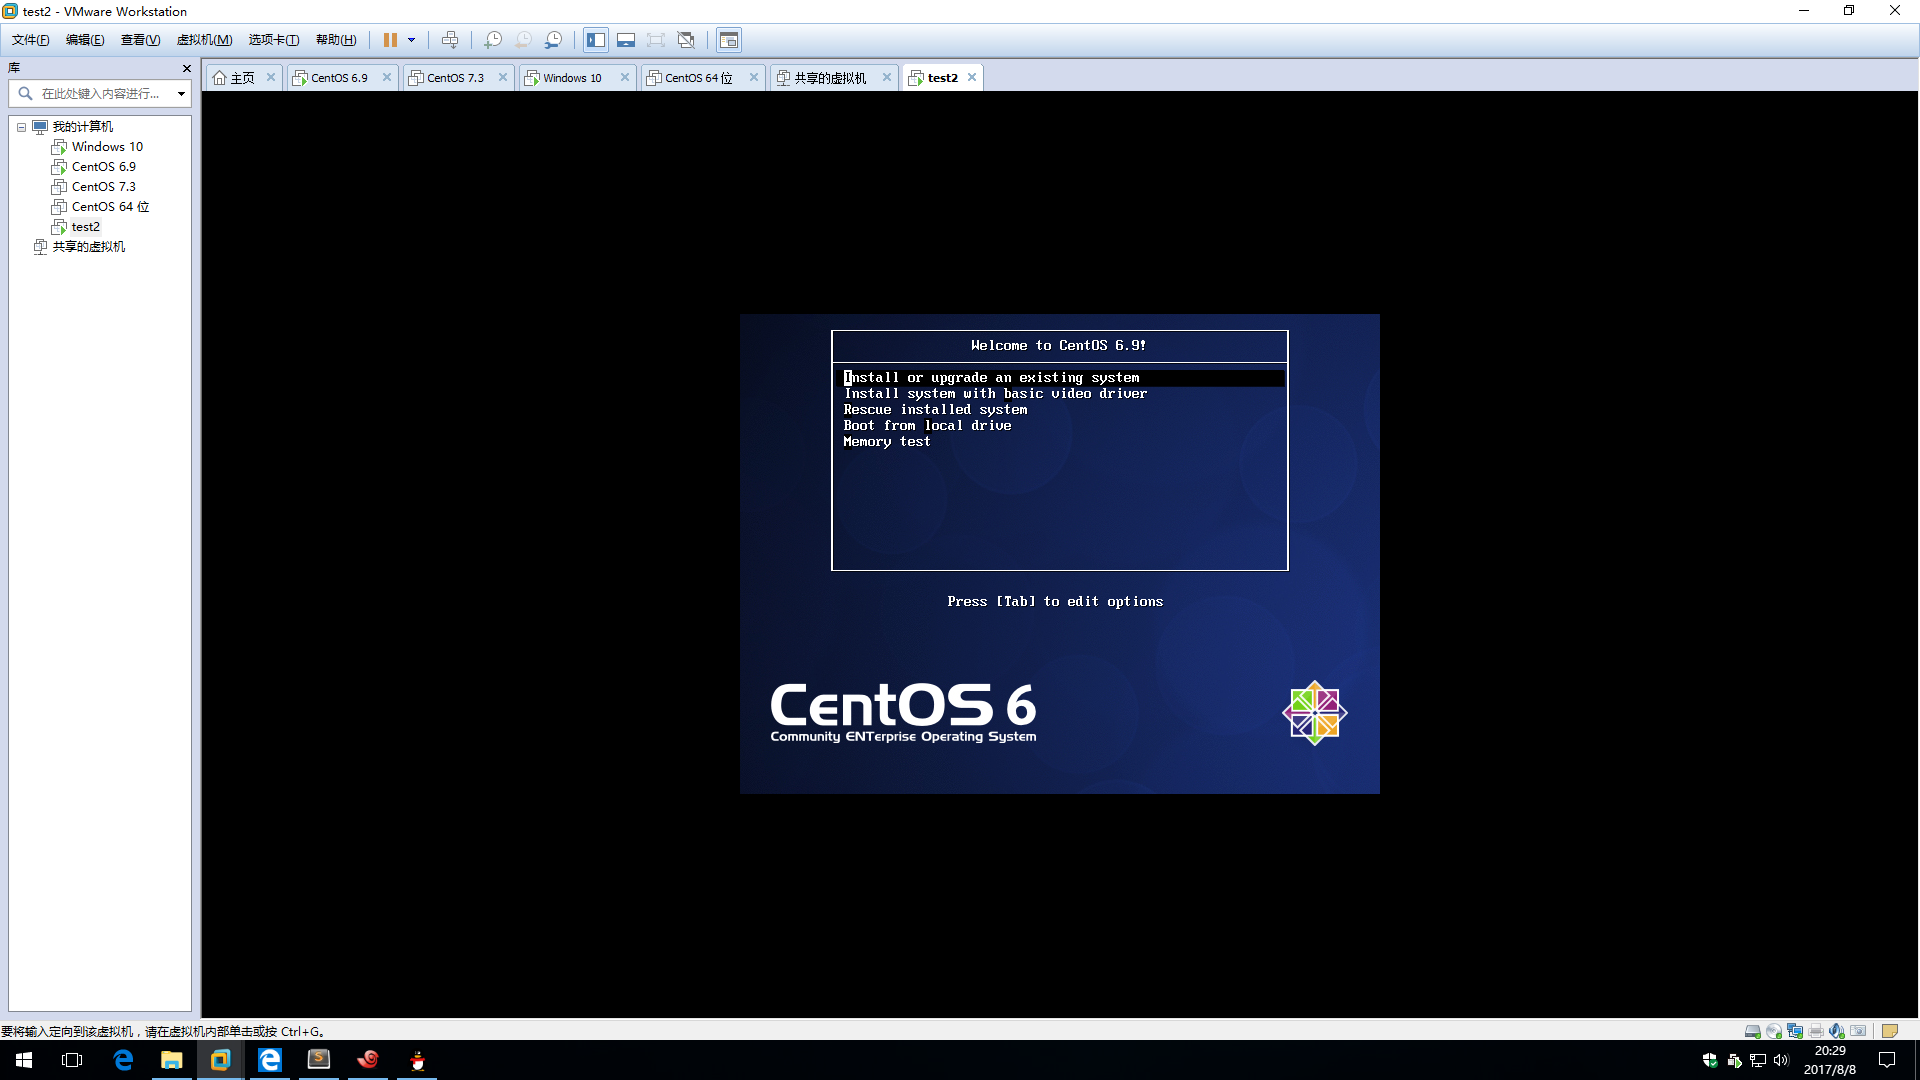
引导光盘可以正常使用
4、写一个脚本
(1) 能接受四个参数:start, stop, restart, status
start: 输出“starting 脚本名 finished.”
…
(2) 其它任意参数,均报错退出;
#!/bin/bash
# testsrv       service testing script
#
# chkconfig:    2345 50 60
# discrption: test
#
#
prog=$(basename $0)

if [ $# -lt 1 ];then
        echo "usage:$prog {start|stop|restart|status}"
        exit 1
fi

if [ $1 == start ];then
        echo "starting $prog finished"
elif [ $1 == stop ];then
        echo "stopping $prog finished"
elif [ $1 == restart ];then
        echo "restart $prog finished"
elif [ $1 == status ];then
        if pidof $prog &> /dev/null;then
                echo "$prog is running"
        else
                echo "$prog is stopped"
        fi
else
        echo "usage:$prog {start|stop|restart|status}"
        exit 2
fi
把次脚本复制到/etc/rc.d/init.d 下
然后执行 chkconfig –add SCRIPTNAME
服务就开启了。
5、写一个脚本,判断给定的用户是否登录了当前系统;
(1) 如果登录了,则显示用户登录,脚本终止;
(2) 每3秒钟,查看一次用户是否登录;
#!/bin/bash
read -p "send a username:" UNAME
while true ;do
        if who | grep "$UNAME" > /dev/null ;then
                break
        fi
        sleep 3
done
6、写一个脚本,显示用户选定要查看的信息;
cpu) display cpu info
mem) display memory info
disk) display disk info
quit) quit
非此四项选择,则提示错误,并要求用户重新选择,只到其给出正确的选择为止;
cat << eof
cpu) display cpu info
mem) display memory info
disk) display disk info
quit) quit
eof

while true; do
        read PARA
        if [ $PARA == cpu ];then
                lscpu
                break
        elif [ $PARA == mem ];then
                free
                break
        elif [ $PARA == disk ];then
                fdisk -l
                break
        elif [ $PARA == quit ];then
                break
        else
                echo "need a right choose"
        fi
done
7、写一个脚本
(1) 用函数实现返回一个用户的UID和SHELL;用户名通过参数传递而来;
(2) 提示用户输入一个用户名或输入“quit”退出;
当输入的是用户名,则调用函数显示用户信息;
当用户输入quit,则退出脚本;进一步地:显示键入的用户相关信息后,再次提醒输出用户名或quit:
原创文章,作者:M36-Masuri,如若转载,请注明出处:http://www.178linux.com/79375
