

1、 请描述一次完整的http请求处理过程;
HTTP:超文本传输协议
完整的http请求过程
1)、建立TCP/IP连接:经过3次握手,建立连接或拒绝。
2)、浏览器向服务器发送HTTP请求。
3)、浏览器发送请求头信息。
4)、服务器应答:服务器接受请求后,会回送应答。
5)、服务器发送应答头信息。
6)、服务器向浏览器发送数据。
7)、服务器关闭TCP连接。
2、httpd所支持的处理模型有哪些,他们的分别使用于哪些环境。
1)prefork:多进程模型,每个进程响应一个请求;一个主进程负责生成n个子进程,子进程也成为工作进程,每个子进程处理一个用户请求;即便没有用户请求,也会预先生成多个空闲进程,随时等待请求到达;最大不会超过1024个;
优点:成熟稳定,兼容所有新老模块。
缺点:一个进程相对占用更多的系统资源,消耗更多的内存。而且,它并不擅长处理高并发请求,理论上不会超过1024个,在大并发场景下,它会将请求放进队列中,一直等到有可用进程,请求才会被处理。
2)worker:多线程模型,每个线程响应一个请求;一个主进程生成多个子进程,每个子进程负责生成多个线程,每个线程响应一个请求;如有m个进程,每个进程有n个线程,则可处理的请求个数为:m*n
优点:占据更少的内存,高并发下表现更优秀。
缺点:
(1)线程的管理要比进程复杂得多。线程之间很多资源是共享的,所以它没有prefork模型那种一个进程服务一个服务请求那么安全稳定;
(2)worker是一个线程服务一个请求,在请求没有完成之前,该线程是与它服务的请求绑定的。worker需要大量的创建进程生成线程,销毁线程,杀死进程的过程;
(3)由于linux不是真线程的操作系统,所以worker在linux上的表现与prefork相比并没有明显优势。
3)event:事件驱动模型,是基于信号驱动I/O 通知机制,每个线程响应n个请求;
优点:并发能力强,并且解决了worker模型下由于线程与请求绑定而导致的线程资源浪费的问题;
缺点:2.4之前的版本仅为测试用,只有2.4之后event才可在生产使用。
3、 源码编译安装LAMP环境(基于wordpress程序),并写出详细的安装、配置、测试过程。
系统环境:CentOS7
编译安装Maridb
1、解压到/usr/local目录下,并创建连接
[root@CentOS7 ~]# tar xf mariadb-5.5.46-linux-x86_64.tar.gz -C /usr/local/
[root@CentOS7 ~]# cd /usr/local
[root@CentOS7 local]# ln -sv mariadb-5.5.46-linux-x86_64/ mysql
“mysql” -> “mariadb-5.5.46-linux-x86_64/”
2、创建用户组mysql,修改目录/usr/local/mysql权限
[root@CentOS7 local]# cd mysql
[root@CentOS7 mysql]# chown -R root.mysql ./*
3、创建数据目录并修改权限
[root@CentOS7 /]# mkdir -p /mydata/data
[root@CentOS7 /]# chown -R mysql.mysql /mydata/data
4、创建配置文件
[root@CentOS7 mysql]# cp support-files/my-large.cnf /etc/my.cnf
[root@CentOS7 support-files]# vim /etc/my.cnf
[mysqld]
datadir = /mydata/data
innodb_file_per_table = ON
skip_name_resolve = ON
5、创建启动脚本
[root@CentOS7 support-files]# cp mysql.server /etc/rc.d/init.d/mysqld
[root@CentOS7 support-files]# chmod +x /etc/rc.d/init.d/mysqld
6、初始化数据库
[root@CentOS7 support-files]# cd /usr//local/mysql/
[root@CentOS7 mysql]# scripts/mysql_install_db –user=mysql –datadir=/mydata/data
7、启动数据库
[root@CentOS7 mysql]# /etc/init.d/mysqld start
Starting MySQL SUCCESS!
编译安装Apache
依赖的开发环境:Development Tools 和 Server Platform Development
依赖的包:pcre-devel arp-devel apr-util-devel openssl-devel
注:
CentOS6还依赖:
Apr1.4+和apr-util-1.4+以上的版本
1、安装所需包
[root@CentOS7 ~]# yum groupinstall “Development Tools” “Server Platform Development” -y
[root@CentOS7 ~]# yum install arp-devel apr-util-devel openssl-devel pcre-devel
2、编译安装Apache
[root@CentOS7 ~]# tar xf httpd-2.4.9.tar.bz2
[root@CentOS7 ~]# cd httpd-2.4.9/
[root@CentOS7 httpd-2.4.9]# ./configure –prefix=/usr/local/apache –sysconfdir=/etc/httpd –enable-so –enable-ssl –enable-cgi –enable-rewrite –enable-zlib –with-pcre –with-apr=/usr –with-apr-util=/usr –enable-modules=most –enable-mpms-shared=all –with-mpm=prefork
[root@CentOS7 httpd-2.4.9]# make -j 2 && make install
3、修改环境变量
[root@CentOS7 httpd-2.4.9]# vim /etc/profile.d/httpd.sh
export PATH=/usr/local/apache/bin:$PATH
[root@CentOS7 httpd-2.4.9]# . /etc/profile.d/httpd.sh
4、启动httpd服务
注:出现以下错误。修改 /etc/httpd/ httpd.conf文件。
ServerName www.example.com:80 取消注释,使其生效
[root@CentOS7 httpd-2.4.9]# apachectl start
AH00558: httpd: Could not reliably determine the server’s fully qualified domain name, using 180.168.41.175. Set the ‘ServerName’ directive globally to suppress this message
编译安装php
1、安装依赖包
[root@CentOS7 ~]#yum install libxml2-devel libmcrypt-devel bzip2-devel
2、编译安装php
[root@CentOS7 ~]# tar xf php-5.4.26.tar.bz2
[root@CentOS7 ~]# cd php-5.4.26
[root@CentOS7 php-5.4.26]# ./configure –prefix=/usr/local/php –with-mysql=/usr/local/mysql –with-openssl –with-mysqli=/usr/local/mysql/bin/mysql_config –enable-mbstring –with-png-dir –with-jpeg-dir –with-freetype-dir –with-zlib –with-libxml-dir=/usr –enable-xml –enable-sockets –with-apxs2=/usr/local/apache/bin/apxs –with-mcrypt –with-config-file-path=/etc –with-config-file-scan-dir=/etc/php.d –with-bz2
[root@CentOS7 php-5.4.26]# make -j 4 && make install
3、修改httpd配置文件,添加支持php
[root@CentOS7 httpd]# vim httpd.conf
252 <IfModule dir_module>
253 DirectoryIndex index.php index.html
254 </IfModule>
382 AddType application/x-httpd-php .php
4、创建php配置文件
[root@CentOS7 php-5.4.26]# cp php.ini-production /etc/php.ini
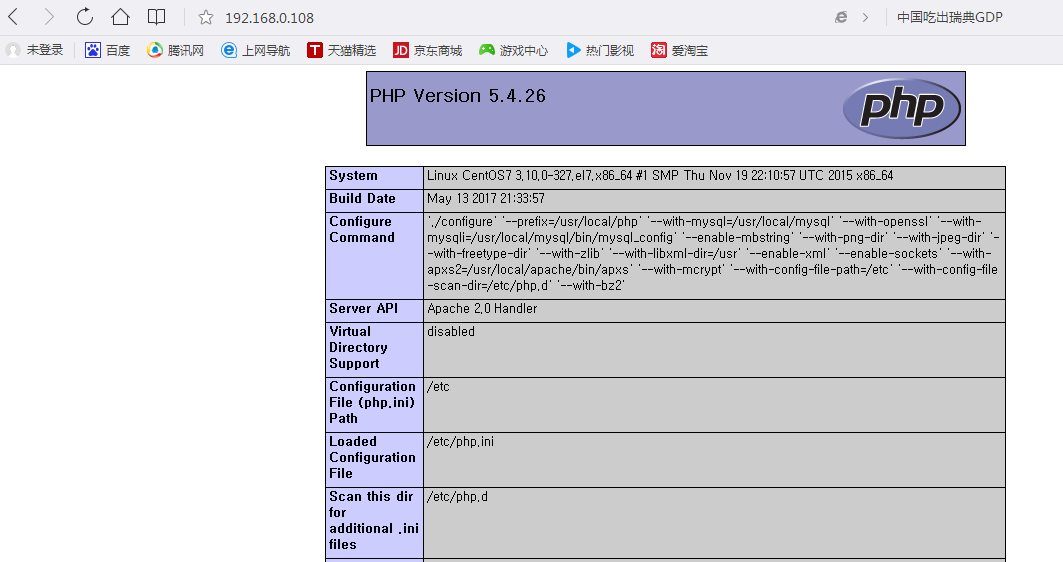
5、建立php测试文档,并重启Apache服务
[root@CentOS7 php-5.4.26]# vim /usr/local/apache/htdocs/index.php
this is php test.
<?php
phpinfo();
?>
[root@CentOS7 php-5.4.26]# apachectl restart

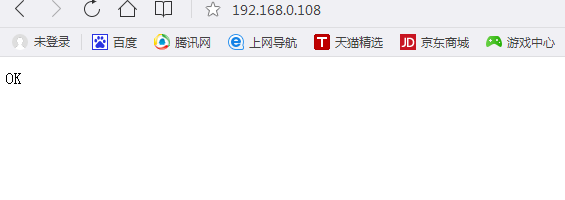
6、测试php与mariadb的联动
[root@CentOS7 httpd-2.4.9]# vim /usr/local/apache/htdocs/index.php
<?php
$conn = mysql_connect(‘127.0.0.1′,’root’,”);
if ($conn)
echo “OK”;
else
echo “Failure”;
?>
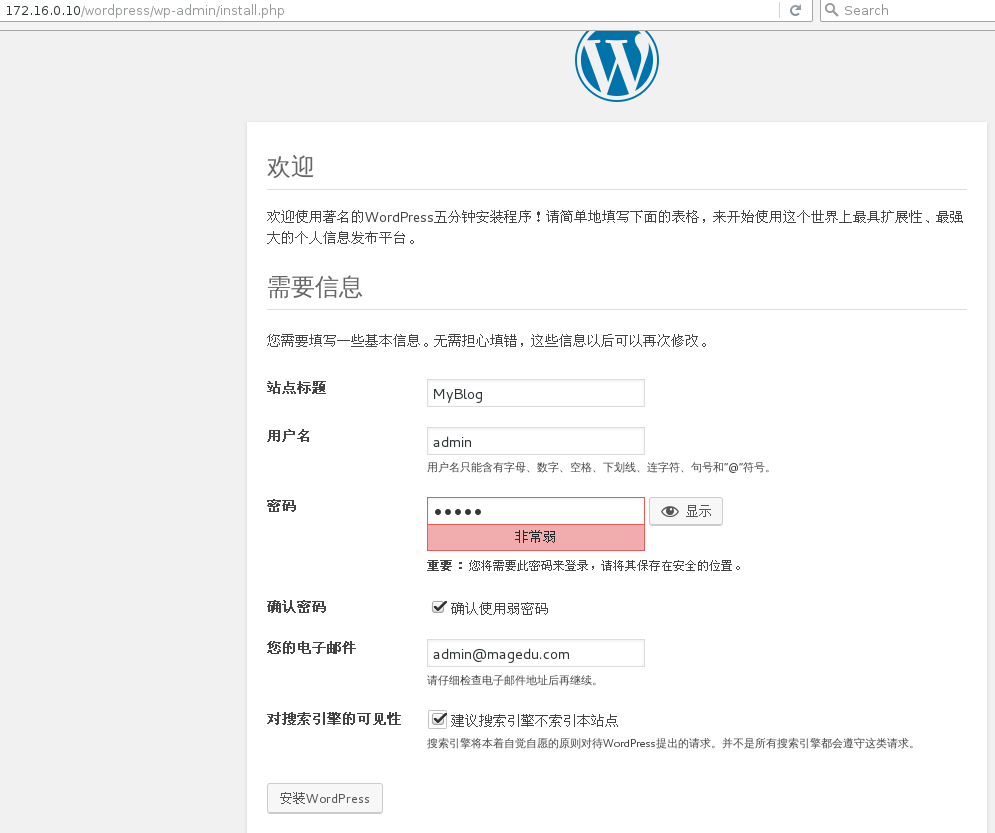
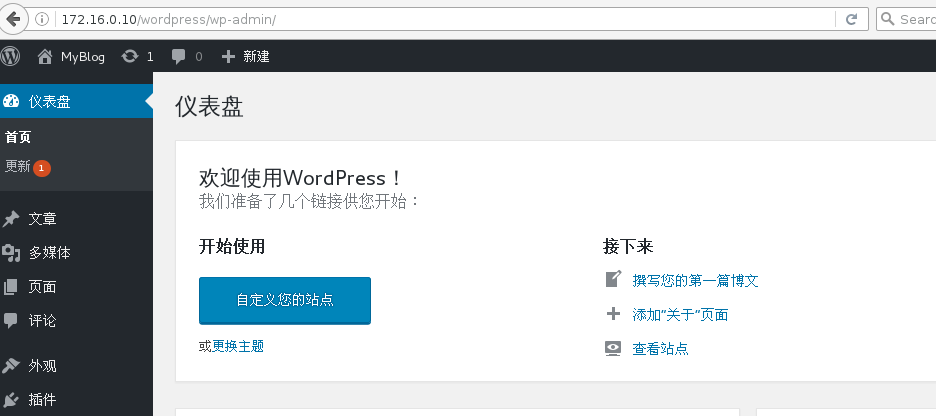
安装wordpress
[root@CentOS7 wordpress]# cp wordpress-4.7.4-zh_CN.zip /usr/local/apache/htdocs/
1、数据库中创建用户
[root@CentOS7 wordpress]# mysql
MariaDB [(none)]> CREATE DATABASE wpdb;
MariaDB [(none)]> GRANT ALL ON wpdb.* TO wpuser@’172.16.%.%’ IDENTIFIED BY ‘wppass’;
MariaDB [(none)]> FLUSH PRIVILEGES;
2、将WordPress安装解压到主页目录下/usr/local/apache/htdocs/
root@CentOS7 wordpress]# cp wordpress-4.7.4-zh_CN.zip /usr/local/apache/htdocs/
[root@CentOS7 wordpress]# cd /usr/local/apache/htdocs/
[root@CentOS7 wordpress]# unzip wordpress-4.7.4-zh_CN.zip
3、修改WordPress配置文件
[root@CentOS7 wordpress]# cd wordpress/
[root@CentOS7 wordpress]# cp wp-config-sample.php wp-config.php
[root@CentOS7 wordpress]# vim wp-config.php
/** MySQL数据库用户名 */
define(‘DB_USER’, ‘wpuser’);
/** MySQL数据库密码 */
define(‘DB_PASSWORD’, ‘wppass’);
/** MySQL主机 */
define(‘DB_HOST’, ‘192.168.0.108’);
[root@CentOS7 wordpress]# apachectl restart
5、通过页面进行安装
4、建立httpd服务器(基于编译的方式进行),要求:
提供两个基于名称的虚拟主机:
(a)www1.stuX.com,页面文件目录为/web/vhosts/www1;错误日志为/var/log/httpd/www1.err,访问日志为/var/log/httpd/www1.access;
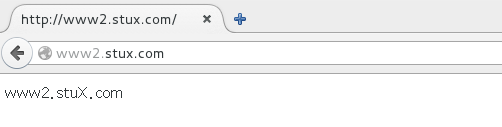
(b)www2.stuX.com,页面文件目录为/web/vhosts/www2;错误日志为/var/log/httpd/www2.err,访问日志为/var/log/httpd/www2.access;
(c)为两个虚拟主机建立各自的主页文件index.html,内容分别为其对应的主机名;
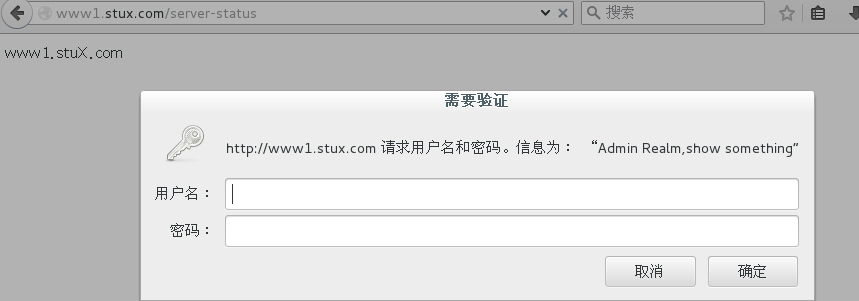
(d)通过www1.stuX.com/server-status输出httpd工作状态相关信息,且只允许提供帐号密码才能访问(status:status);
1、创建目录与文件
[root@CentOS7 ~]# mkdir -p /web/vhosts/www1
[root@CentOS7 ~]# mkdir -p /var/log/httpd
[root@CentOS7 ~]# mkdir -p /web/vhosts/www2
[root@CentOS7~]#echo”www1.stuX.com” >/web/vhosts/www1/index.html
[root@CentOS7~]#echo”www2.stuX.com” >/web/vhosts/www2/index.htm
2、在/etc/httpd/extra/目录下创建配置文件
[root@CentOS7 extra]# vim /etc/httpd/extra/vhost.conf
<VirtualHost *:80>
ServerName www1.stuX.com
DocumentRoot “/web/vhosts/www1”
<Directory “/web/vhosts/www1”>
Options None
AllowOverride None
Require all granted
</Directory>
ErrorLog “/var/log/httpd/www1.err”
CustomLog “/var/log/httpd/www1.access” common
#启动server-status页面并限制用户访问
<Location /server-status>
SetHandler server-status
AuthType Basic
AuthName “Admin Realm,show something”
AuthUserFile “/etc/httpd/.htpasswd”
Require user tom
</Location>
</VirtualHost>
<VirtualHost *:80>
ServerName www2.stuX.com
DocumentRoot “/web/vhosts/www2”
<Directory “/web/vhosts/www2”>
Options None
AllowOverride None
Require all granted
</Directory>
ErrorLog “/var/log/httpd/www2.err”
CustomLog “/var/log/httpd/www2.access” common
</VirtualHost>
3、创建可查看状态页的用户
[root@CentOS7 extra]# htpasswd -c -m /etc/httpd/.htpasswd tom
New password:
Re-type new password:
Adding password for user tom
4、修改httpd的主配置文件,导入创建的文件
[root@CentOS7 httpd]# vim /etc/httpd/httpd.conf
Include /etc/httpd/extra/vhost.conf
5、修改hosts文件,重启Apache服务
[root@CentOS7 httpd]# vim /etc/hosts
192.168.0.109 www1.stuX.com www2.stuX.com
[root@CentOS7 httpd]# apachectl restart
6、测试
5、为第4题中的第2个虚拟主机提供https服务,使得用户可以通过https安全的访问此web站点;
(1)要求使用证书认证,证书中要求使用的国家(CN)、州(HA)、城市(ZZ)和组织(MageEdu);
(2)设置部门为Ops,主机名为www2.stuX.com,邮件为admin@stuX.com;
环境:
Web服务器:192.168.0.109 CentOS7
CA主机:192.168.0.110 CentOS7
在CA主机
1、CA主机创建自签证书
[root@CentOS7 ~]# cd /etc/pki/CA
[root@CentOS7 CA]# (umask 077;openssl genrsa -out private/cakey.pem 2048)
Generating RSA private key, 2048 bit long modulus
………………………………………………………………………………..+++
……………………………………………………………………………………………………………………………………………………+++
e is 65537 (0x10001)
[root@CentOS7 CA]# openssl req -new -x509 -key private/cakeynew.pem -out cacert.pem -days 365
You are about to be asked to enter information that will be incorporated
into your certificate request.
What you are about to enter is what is called a Distinguished Name or a DN.
There are quite a few fields but you can leave some blank
For some fields there will be a default value,
If you enter ‘.’, the field will be left blank.
—–
Country Name (2 letter code) [XX]:CN
State or Province Name (full name) []:HA
Locality Name (eg, city) [Default City]:ZZ
Organization Name (eg, company) [Default Company Ltd]:MageEdu
Organizational Unit Name (eg, section) []:Ops
Common Name (eg, your name or your server’s hostname) []:www2.stuX.com
Email Address []:admin@stuX.com
[root@CentOS7 CA]# touch serial index.txt
[root@CentOS7 CA]# echo 01 > serial
Web服务器上
2、服务器生成证书请求,并发给CA主机
[root@CentOS7 extra]# cd /etc/httpd/
[root@CentOS7 httpd]# mkdir ssl
[root@CentOS7 httpd]# cd ssl
[root@CentOS7 ssl]# (umask 077 ;openssl genrsa -out httpd.key 1024)
Generating RSA private key, 1024 bit long modulus
.++++++
………..++++++
e is 65537 (0x10001)
[root@CentOS7 ssl]# openssl req -new -key httpd.key -out httpd.csr -days 365
You are about to be asked to enter information that will be incorporated
into your certificate request.
What you are about to enter is what is called a Distinguished Name or a DN.
There are quite a few fields but you can leave some blank
For some fields there will be a default value,
If you enter ‘.’, the field will be left blank.
—–
Country Name (2 letter code) [XX]:CN
State or Province Name (full name) []:HA
Locality Name (eg, city) [Default City]:ZZ
Organization Name (eg, company) [Default Company Ltd]:MageEdu
Organizational Unit Name (eg, section) []:Ops
Common Name (eg, your name or your server’s hostname) []:www2.stu2.com
Email Address []:admin@stu2.com
Please enter the following ‘extra’ attributes
to be sent with your certificate request
A challenge password []:
An optional company name []:
[root@CentOS7 ssl]# scp httpd.csr root@192.168.0.110:/tmp
The authenticity of host ‘192.168.0.110 (192.168.0.110)’ can’t be established.
ECDSA key fingerprint is b6:53:54:63:50:3c:99:f3:5c:f1:94:da:60:29:50:b9.
Are you sure you want to continue connecting (yes/no)? yes
Warning: Permanently added ‘192.168.0.110’ (ECDSA) to the list of known hosts.
root@192.168.0.110’s password:
httpd.csr
注:scp出现报错,使用ssh-keygen -R 主机IP
[root@CentOS7 ssl]# scp httpd.csr root@192.168.0.110:/tmp
@@@@@@@@@@@@@@@@@@@@@@@@@@@@@@@@@@@@@@@@@@@@@@@@@@@@@@@@@@@
@ WARNING: REMOTE HOST IDENTIFICATION HAS CHANGED! @
@@@@@@@@@@@@@@@@@@@@@@@@@@@@@@@@@@@@@@@@@@@@@@@@@@@@@@@@@@@
IT IS POSSIBLE THAT SOMEONE IS DOING SOMETHING NASTY!
Someone could be eavesdropping on you right now (man-in-the-middle attack)!
It is also possible that a host key has just been changed.
The fingerprint for the RSA key sent by the remote host is
58:f2:c5:cf:d2:90:7d:4f:a0:1f:a8:e0:ee:6d:d6:41.
Please contact your system administrator.
Add correct host key in /root/.ssh/known_hosts to get rid of this message.
Offending RSA key in /root/.ssh/known_hosts:1
RSA host key for 192.168.0.110 has changed and you have requested strict checking.
Host key verification failed.
lost connection
[root@CentOS7 ssl]# ssh-keygen -R 192.168.0.110
3、CA主机签署,并发送
[root@CentOS7 CA]# openssl ca -in /tmp/httpd.csr -out certs/httpdnew.crt -days 365
Using configuration from /etc/pki/tls/openssl.cnf
Check that the request matches the signature
Signature ok
Certificate Details:
Serial Number: 1 (0x1)
Validity
Not Before: May 15 06:16:31 2017 GMT
Not After : May 15 06:16:31 2018 GMT
Subject:
countryName = CN
stateOrProvinceName = HA
organizationName = MageEdu
organizationalUnitName = Ops
commonName = www2.stu2.com
emailAddress = admin@stu2.com
X509v3 extensions:
X509v3 Basic Constraints:
CA:FALSE
Netscape Comment:
OpenSSL Generated Certificate
X509v3 Subject Key Identifier:
DD:5E:C4:8E:48:6C:EF:14:A0:EF:1F:80:2A:AF:CC:00:97:C8:23:1E
X509v3 Authority Key Identifier:
keyid:18:C2:6D:B5:63:A4:9C:A0:33:08:79:D1:02:62:37:92:51:D3:EF:09
[root@CentOS7 CA]# scp certs/httpdnew.crt root@192.168.0.109:/etc/httpd/ssl/
[root@CentOS7 ssl]# ls
httpd.csr httpd.key httpdnew.crt
4、服务器安装mod_ssl模块
[root@CentOS7 ssl]# yum -y install mod_ssl
5、修改配置文件
[root@CentOS7 extra]# vim /etc/httpd/conf.d/httpd-ssl.conf
DocumentRoot “/web/vhosts/www2”
SSLCertificateFile “/etc/httpd/ssl/httpdnew.crt”
SSLCertificateKeyFile “/etc/httpd/ssl/httpd.key”
[root@CentOS7 httpd]# vim httpd.conf
LoadModule slotmem_shm_module modules/mod_slotmem_shm.so
LoadModule ssl_module modules/mod_ssl.so
6、重启服务
[root@CentOS7 httpd]# systemtl restart httpd.service
6、在LAMP架构中,请分别以php编译成httpd模块形式和php以fpm工作为独立守护进程的方式来支持httpd,列出详细的过程。
本例只有php-fpm的相关配置,其他见第三题。
1、安装httpd 、mariadb.server 、php-fpm 、php-mysql
[root@CentOS7 ~]# yum install -y httpd mariadb.server php-fpm php-mysql
2、修改php-fpm的配置文件
[root@CentOS7 ~]# vim /etc/php-fpm.d/www.conf
listen = 0.0.0.0:9000
3、创建fcgi的配置文件
[root@CentOS7 ~]# vim /etc/httpd/conf.d/fcgi.conf
DirectoryIndex index.php 设置主页
ProxyRequests off 关闭正向代理
ProxyPassMatch ^/(.*\.php)$ fcgi://127.0.0.1:9000/var/www/html/$1
.php后 缀的URL请求转发给php-fpm
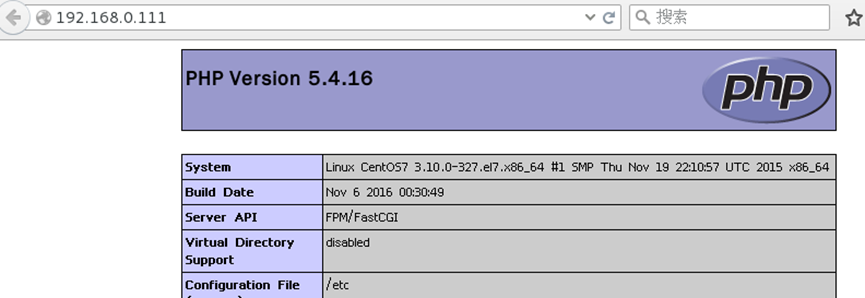
4、开启php-fpm与httpd服务
[root@CentOS7 ~]# systemctl start httpd.service
[root@CentOS7 ~]# systemctl start php-fpm.service
5 、测试
原创文章,作者:ning407631632,如若转载,请注明出处:http://www.178linux.com/76066

评论列表(1条)
实验过程清晰,步骤详细,另外如果能有对应的压测性能报告会更好,尤其是perfork和worker原理理解和压测验证方面的知识。