

申请证书:
后缀类型解释:
- 证书:crt(签发的证书),pem(ca 服务器自签证书)
- 私钥:key
- 证书请求:csr
一、ca 服务器 (192.168.1.110):
1.使用命令:生成私钥。
[root@MiWiFi-R3-srv pki]# (umask 077; openssl genrsa -out /etc/pki/CA/private/cakey.pem 4096)
Generating RSA private key, 4096 bit long modulus
.................................................................................................................................................................................................++
..........................++
e is 65537 (0x10001)
2.生成自签证书
[root@MiWiFi-R3-srv pki]# openssl req -new -x509 -key /etc/pki/CA/private/cakey.pem -out /etc/pki/CA/cacert.pem -days 3655
You are about to be asked to enter information that will be incorporated
into your certificate request.
What you are about to enter is what is called a Distinguished Name or a DN.
There are quite a few fields but you can leave some blank
For some fields there will be a default value,
If you enter '.', the field will be left blank.
-----
Country Name (2 letter code) [XX]:CN
State or Province Name (full name) []:shandong
Locality Name (eg, city) [Default City]:tengzhou
Organization Name (eg, company) [Default Company Ltd]:mageedu
Organizational Unit Name (eg, section) []:ops
Common Name (eg, your name or your server's hostname) []:ca.magedu.com
Email Address []:
3.创建CA所需要的目录及文件
[root@MiWiFi-R3-srv pki]# mkdir -pv /etc/pki/CA/{certs,crl,newcerts}
mkdir: 已创建目录 "/etc/pki/CA/certs"
mkdir: 已创建目录 "/etc/pki/CA/crl"
mkdir: 已创建目录 "/etc/pki/CA/newcerts"
[root@MiWiFi-R3-srv pki]# touch /etc/pki/CA/{serial,index.txt}
[root@MiWiFi-R3-srv pki]# echo 01 > /etc/pki/CA/serial
二、客户端(191.168.1.175) 申请证书
1.创建目录
[root@localhost ~]# mkdir -pv /etc/httpd/ssl
mkdir: 已创建目录 "/etc/httpd"
mkdir: 已创建目录 "/etc/httpd/ssl"
[root@localhost ~]# cd /etc/httpd/ssl
2.用到证书的主机生成私钥
[root@localhost ssl]# (umask 077; openssl genrsa -out /etc/httpd/ssl/httpd.key 2048)
Generating RSA private key, 2048 bit long modulus
............................................+++
.........................................................................+++
e is 65537 (0x10001)
3.生成证书签署请求
[root@localhost ssl]# openssl req -new -key /etc/httpd/ssl/httpd.key -out /etc/httpd/ssl/httpd.csr -days 365
You are about to be asked to enter information that will be incorporated
into your certificate request.
What you are about to enter is what is called a Distinguished Name or a DN.
There are quite a few fields but you can leave some blank
For some fields there will be a default value,
If you enter '.', the field will be left blank.
-----
Country Name (2 letter code) [XX]:CN
State or Province Name (full name) []:shandong
Locality Name (eg, city) [Default City]:tengzhou
Organization Name (eg, company) [Default Company Ltd]:mageedu
Organizational Unit Name (eg, section) []:ops
Common Name (eg, your name or your server's hostname) []:www.magedu.com
Email Address []:

Please enter the following 'extra' attributes
to be sent with your certificate request
A challenge password []:123456
An optional company name []:a
将申请以可靠的方式发送给192.168.1.110 CA服务器
[root@localhost ssl]# scp httpd.csr root@192.168.1.110:/tmp/
root@192.168.1.110's password:
httpd.csr                                                                                       100% 1066     1.0KB/s   00:00
三、ca 服务器(192.168.1.110) 签发证书
[root@MiWiFi-R3-srv pki]# openssl ca -in /tmp/httpd.csr -out /etc/pki/CA/certs/httpd.crt -days 365
Using configuration from /etc/pki/tls/openssl.cnf
Check that the request matches the signature
Signature ok
Certificate Details:
        Serial Number: 1 (0x1)
        Validity
            Not Before: Apr 29 14:59:43 2018 GMT
            Not After : Apr 29 14:59:43 2019 GMT
        Subject:
            countryName               = CN
            stateOrProvinceName       = shandong
            organizationName          = mageedu
            organizationalUnitName    = ops
            commonName                = www.magedu.com
        X509v3 extensions:
            X509v3 Basic Constraints:
                CA:FALSE
            Netscape Comment:
                OpenSSL Generated Certificate
            X509v3 Subject Key Identifier:
                52:45:76:06:A8:43:FC:2B:E4:71:D1:F1:F0:EF:C7:A3:AB:76:66:29
            X509v3 Authority Key Identifier:
                keyid:39:B3:4B:48:C3:28:1A:4B:D0:6E:A1:4F:5E:1A:47:AD:CE:85:CC:00

Certificate is to be certified until Apr 29 14:59:43 2019 GMT (365 days)
Sign the certificate? [y/n]:y


1 out of 1 certificate requests certified, commit? [y/n]y
Write out database with 1 new entries
Data Base Updated
查看证书信息
[root@MiWiFi-R3-srv pki]# openssl x509 -in /etc/pki/CA/certs/httpd.crt -noout -serial -subject
serial=01
subject= /C=CN/ST=shandong/O=mageedu/OU=ops/CN=www.magedu.com
查看证书序列
[root@MiWiFi-R3-srv CA]# cat /etc/pki/CA/index.txt
V	190429145943Z		01	unknown	/C=CN/ST=shandong/O=mageedu/OU=ops/CN=www.magedu.com
将签发的证书发送给 申请主机
[root@localhost certs]# scp httpd.crt root@192.168.1.175:/etc/httpd/ssl/
APache 配置证书
192.168.1.175 测试服务器
准备:
[root@localhost ssl]# yum -y install mod_ssl
1、编辑配置文件 添加私钥和掐发证书路径
[root@localhost ssl]# vim /etc/httpd/conf.d/ssl.conf

#   Server Certificate:
# Point SSLCertificateFile at a PEM encoded certificate.  If
# the certificate is encrypted, then you will be prompted for a
# pass phrase.  Note that a kill -HUP will prompt again.  A new
# certificate can be generated using the genkey(1) command.
#SSLCertificateFile /etc/pki/tls/certs/localhost.crt
SSLCertificateFile /etc/httpd/ssl/httpd.crt   修改私签发证书路径

#   Server Private Key:
#   If the key is not combined with the certificate, use this
#   directive to point at the key file.  Keep in mind that if
#   you've both a RSA and a DSA private key you can configure
#   both in parallel (to also allow the use of DSA ciphers, etc.)
#SSLCertificateKeyFile /etc/pki/tls/private/localhost.key
SSLCertificateKeyFile /etc/httpd/ssl/httpd.key  修改私钥指向路径
2、重启Apache 的服务
[root@localhost ssl]# systemctl restart httpd.service
3、使用浏览器 输入 https://web服务器ip 查看证书
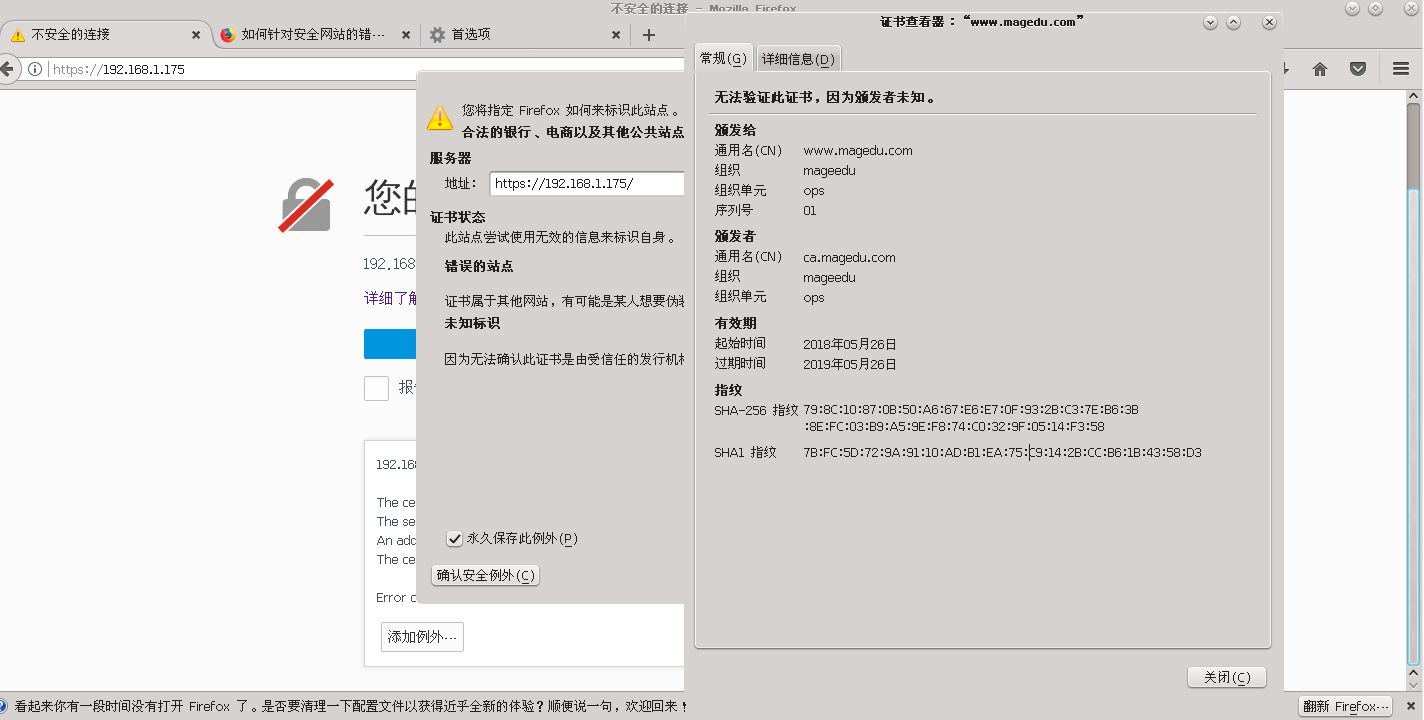

马哥笔记 网络笔记
使用命令停掉httpd服务,在进行nginx测试;
Nginx 配置证书
192.168.1.175 测试服务器
准备yum官方源
要为RHEL / CentOS设置yum存储库,请/etc/yum.repos.d/nginx.repo 使用以下内容创建名为的文件 :

[nginx]
name=nginx repo
baseurl=http://nginx.org/packages/mainline/OS/OSRELEASE/$basearch/
gpgcheck=0
enabled=1

将“ OS” 替换为“ rhel”或“ centos”,这取决于所使用的分布,以及“ OSRELEASE”替换为“ 6”或“ 7”,分别用于6.x或7.x版本。
1、安装nginx
[root@localhost conf.d]# yum -y install nginx
2、新建一个测试文件
[root@localhost conf.d]# vim /etc/nginx/conf.d/magedu.conf


server {
        listen 443 ssl;   新增端口
        server_name magedu.com;       服务器名称
        root /usr/share/nginx/html;   默认网站文件为准
        index index.php index.html;
        ssl_certificate /etc/httpd/ssl/httpd.crt;       添加签发证书
        ssl_certificate_key /etc/httpd/ssl/httpd.key;   添加主机私钥

        ssl_stapling on;
        ssl_stapling_verify on;


}
3、重载配置
[root@localhost conf.d]# systemctl restart nginx
4、测试
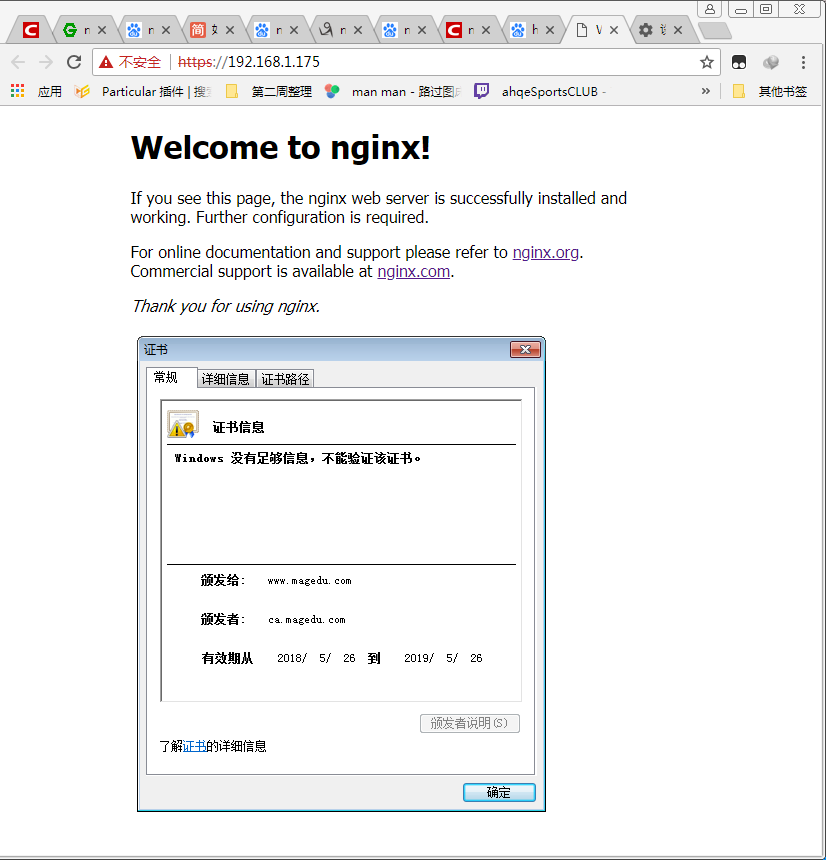
本文来自投稿,不代表Linux运维部落立场,如若转载,请注明出处:http://www.178linux.com/99544
