

本文所做的所有操作是在一部新安装的CentOS6.9系统上。
1.环境与配置
环境说明:VMware上安装的CentOS6.9系统,两张系统盘做成的yum源
配置:编译生成的所有的文件都存放在/usr/local/httpd22/这个目录下
2.安装GCC编译器
[root@localhost ~]# yum grouplist | grep "Development tools"
   Development tools
#安装Developmnt tools这个软件包组
[root@localhost ~]# yum groupinstall -y "Development tools"
Loaded plugins: fastestmirror
Setting up Group Process
Loading mirror speeds from cached hostfile
...          #中间省略
Package 1:make-3.81-23.el6.x86_64 already installed and latest version
Package 1:pkgconfig-0.23-9.1.el6.x86_64 already installed and latest version
Package binutils-2.20.51.0.2-5.46.el6.x86_64 already installed and latest version
Resolving Dependencies
--> Running transaction check
---> Package autoconf.noarch 0:2.63-5.1.el6 will be installed
--> Processing Dependency: perl >= 5.005_03 for package: autoconf-2.63-5.1.el6.noarch
--> Processing Dependency: perl >= 5.005 for package: autoconf-2.63-5.1.el6.noarch
...         #中间省略
Verifying  : elfutils-0.164-2.el6.x86_64                               106/113
Verifying  : 1:perl-Module-Pluggable-3.90-144.el6.x86_64               107/113
Verifying  : byacc-1.9.20070509-7.el6.x86_64                           108/113
Verifying  : libXft-2.3.2-1.el6.x86_64                                 109/113
Verifying  : libedit-2.11-4.20080712cvs.1.el6.x86_64                   110/113
Verifying  : libICE-1.0.6-1.el6.x86_64                                 111/113
Verifying  : perl-XML-Parser-2.36-7.el6.x86_64                         112/113
Verifying  : libxcb-1.12-4.el6.x86_64                                  113/113
...         #中间省略
ppl.x86_64 0:0.10.2-11.el6
rsync.x86_64 0:3.0.6-12.el6
systemtap-client.x86_64 0:2.9-7.el6
systemtap-devel.x86_64 0:2.9-7.el6
systemtap-runtime.x86_64 0:2.9-7.el6
unzip.x86_64 0:6.0-5.el6
xz.x86_64 0:4.999.9-0.5.beta.20091007git.el6
xz-lzma-compat.x86_64 0:4.999.9-0.5.beta.20091007git.el6
zip.x86_64 0:3.0-1.el6_7.1
Complete!
可以看到这次总共安装了113个软件包。
3.解压httpd源码包,并进入软件包目录内
#解压软件包
[root@localhost ~]# ll -h httpd-2.2.32.tar.bz2
-rw-r--r--. 1 root root 5.6M Apr 20 16:56 httpd-2.2.32.tar.bz2
 [root@localhost ~]# tar xf httpd-2.2.32.tar.bz2
[root@localhost ~]# ll -h
total 5.6M
drwxr-xr-x. 11 1001 1001 4.0K Jan 10 01:36 httpd-2.2.32
-rw-r--r--.  1 root root 5.6M Apr 20 16:56 httpd-2.2.32.tar.bz2
#进入解压后的目录
[root@localhost ~]# cd httpd-2.2.32
[root@localhost httpd-2.2.32]# ll
total 1172
-rw-r--r--.  1 1001 1001  14882 Nov 22  2004 ABOUT_APACHE
-rw-r--r--.  1 1001 1001  18613 Jul  6  2012 acinclude.m4
-rw-r--r--.  1 1001 1001  56952 Oct  6  2010 Apache.dsw
drwxr-xr-x.  6 1001 1001   4096 Jan 10 01:36 build
-rw-r--r--.  1 1001 1001   2644 Aug 24  2007 BuildAll.dsp
...          #中间省略
drwxr-xr-x.  3 1001 1001   4096 Jan 10 01:36 server
drwxr-xr-x.  5 1001 1001   4096 Jan 10 01:36 srclib
drwxr-xr-x.  4 1001 1001   4096 Jan 10 01:36 support
drwxr-xr-x.  2 1001 1001   4096 Jan 10 01:36 test
-rw-r--r--.  1 1001 1001   8183 Oct 18  2005 VERSIONING
4.编译安装
[root@localhost httpd-2.2.32]# ./configure --prefix=/usr/local/httpd22
...          #中间省略
config.status: creating support/envvars-std
config.status: creating support/log_server_status
config.status: creating support/logresolve.pl
config.status: creating support/phf_abuse_log.cgi
config.status: creating support/split-logfile
config.status: creating build/rules.mk
config.status: creating build/pkg/pkginfo
config.status: creating build/config_vars.sh
config.status: creating include/ap_config_auto.h
config.status: executing default commands
可以看到中间没有报错,可以进入下一步了。
[root@localhost httpd-2.2.32]# make && make install
...          #中间省略
make[2]: Leaving directory `/root/httpd-2.2.32/modules/mappers'
make[2]: Entering directory `/root/httpd-2.2.32/modules'
make[2]: Leaving directory `/root/httpd-2.2.32/modules'
make[1]: Leaving directory `/root/httpd-2.2.32/modules'
Making install in support
make[1]: Entering directory `/root/httpd-2.2.32/support'
make[2]: Entering directory `/root/httpd-2.2.32/support'
make[2]: Leaving directory `/root/httpd-2.2.32/support'
make[1]: Leaving directory `/root/httpd-2.2.32/support'
make[1]: Entering directory `/root/httpd-2.2.32'
Installing configuration files
mkdir /usr/local/httpd22/conf
mkdir /usr/local/httpd22/conf/extra
mkdir /usr/local/httpd22/conf/original
mkdir /usr/local/httpd22/conf/original/extra
Installing HTML documents
mkdir /usr/local/httpd22/htdocs
Installing error documents
mkdir /usr/local/httpd22/error
Installing icons
mkdir /usr/local/httpd22/icons
mkdir /usr/local/httpd22/logs
Installing CGIs
mkdir /usr/local/httpd22/cgi-bin
Installing header files
Installing build system files
Installing man pages and online manual
mkdir /usr/local/httpd22/man
mkdir /usr/local/httpd22/man/man1
mkdir /usr/local/httpd22/man/man8
mkdir /usr/local/httpd22/manual
make[1]: Leaving directory `/root/httpd-2.2.32'
好了,编译安装已经完成,接下来就要对系统进行配置了。
5.把httpd的可执行程序加入系统环境变量
#加入系统环境变量以后使用httpd就不再需要每次都输入其绝对路径,方便快捷。

[root@localhost httpd-2.2.32]# vi /etc/profile.d/httpd.sh
#在/etc/profile.d/这个目录新建一个httpd.sh的文件,加入以下内容:
PATH=$PATH:/usr/local/httpd22/bin
export PATH
然后保存退出,执行以下命令,使这个文件生效。
[root@localhost httpd-2.2.32]# source  /etc/profile.d/httpd.sh
6.关闭系统防火墙
[root@localhost httpd-2.2.32]# service iptables stop
iptables: Setting chains to policy ACCEPT: filter          [  OK  ]
iptables: Flushing firewall rules:                         [  OK  ]
iptables: Unloading modules:
7.启动httpd
[root@localhost httpd-2.2.32]# apachectl start
httpd: Could not reliably determine the server's fully qualified domain name, using localhost.localdomain for ServerName
#这个报错可以暂时不用理会,不关系到本次试验的成败
[root@localhost httpd-2.2.32]# netstat -tunlp
Active Internet connections (only servers)
Proto Recv-Q Send-Q Local Address               Foreign Address             State       PID/Program name
tcp        0      0 0.0.0.0:22                  0.0.0.0:*                   LISTEN      1333/sshd
tcp        0      0 127.0.0.1:25                0.0.0.0:*                   LISTEN      1412/master
tcp        0      0 :::80                       :::*                        LISTEN      27285/httpd
tcp        0      0 :::22                       :::*                        LISTEN      1333/sshd
tcp        0      0 ::1:25
可以看到系统中的80端口已经开启
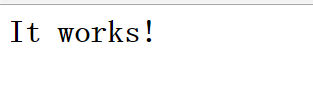
打开系统浏览器,输入虚拟机的IP地址,回车,可以看到以下界面,说明apache已经在工作了。

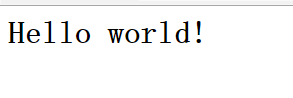
#进入apache存放默认存放网页的目录
[root@localhost httpd-2.2.32]# cd /usr/local/httpd22/htdocs/
[root@localhost htdocs]# ls
index.html

[root@localhost htdocs]# vi index.html
#编辑index.html文件,把原有内容换成以下内容
<html><body><h1>Hello world!</h1></body></html>
刷新浏览器,可以看到网页内容变了,再次确认apache在工作中。
8.把httpd的库文件加入到系统的库中,这样别的软件包就也使用这些库文件了。
[root@localhost htdocs]# vi /etc/ld.so.conf.d/httpd.conf
[root@localhost htdocs]# ldconfig
#让系统生成库文件的缓存
9.把httpd的man文档加入到系统的man库中,方便随时调用
[root@localhost htdocs]# vi /etc/man.config

 43 MANPATH /usr/man
 44 MANPATH /usr/share/man
 45 MANPATH /usr/local/man
 46 MANPATH /usr/local/share/man
 47 MANPATH /usr/X11R6/man
 48 MANPATH /usr/local/httpd22/man
#在第47行下边加入httpd的man文件的地址
大功告成!!So easy吧!
原创文章,作者:renpingsheng,如若转载,请注明出处:http://www.178linux.com/73809

评论列表(1条)
文章详细的介绍了httpd的编译安装的过程,流程写的很详细,666